Wednesday, October 28, 2015

Dog Agility Week 6: My Pre-Agility Trial Practice


 Hello everyone!

With agility trial day approaching quickly, I decided to head out to where I take classes and do some pre-agility trial practice with my two dogs.  Even though you may not be at the competition level just yet, this video and these tips can still be helpful for any level dog trainer.

I have been competing with my two dogs for about 6 months now and before every trial I go through the same practice routine to ensure that my dogs are totally and completely confident with any obstacle thrown their way. 

I usually am sure to practice the three major contact obstacle: the A-frame, dog walk, and teeter.  These three obstacles can give any handler the most problems when competing in the Standard AKC ring.  As you will see in the video, I do not practice any specific sequence with these obstacles, I just make sure my dog has no doubts or fears on how to properly perform the obstacle.

Moving on, the broad jump is another obstacle that has caused a few issues over the past few months, so I am always sure to get a good, successful practice out of it.  To make sure my dog properly performs the broad jump, I run fast past it, creating momentum and increasing my dog's drive over the jump. 

Another frustrating obstacle in the Standard AKC ring is the chute (aka collapsed tunnel/closed tunnel).  My very first trial with Goliath, he REFUSED to go through the chute so ever since then, I have made sure to practice it before a trial.  Now you can see in the video, he flies through the chute with ease and is totally confident with it! A little practice can really go a long way!

Along with all the other obstacles, I make sure to practice these obstacles to give the best performance I can while out in the ring with my dogs.  Even if you aren't at competition level yet, this video can come in handy when just teaching these obstacles.  Anyways, I hope you enjoyed the video and I hope you found this helpful!

Happy Training!

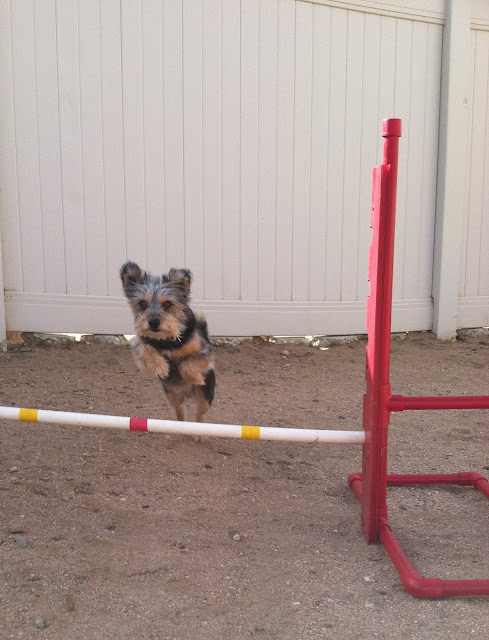
Strider perfecting his two-on two-off on the dog walk.

Saturday, October 17, 2015

Dog Agility Week Five: Training the Agility Open Tunnel

Hello everyone!

This week we will take a look at one of my most favorite obstacles in dog agility, the open tunnel.  This obstacle can be handled and used in so many ways that the training for it is open to so many opportunities.  Although the tunnel can be used in many advanced ways, in this video we are going to look at it in a very simple, easy to train way.  Remember, the tunnel can be a little scary for dogs at first, so use lots of praise and stay consistent with your training!

For those of you who want to learn more about the tunnel obstacle than just what the video shows, keep reading.

The tunnel is used in all agility trials and is a common obstacle that your dog must be familiar with and comfortable with early on.  Once your dog understands the concept of the tunnel, they will be zoomin' through it as quick as possible.  But before we get to that point, you have to start somewhere.  In this video you will see how I begin with the tunnel scrunched up, in a straight line.  You want the dog to be able to see the end of the tunnel and for the dog to see that it always leads out and they will never be trapped inside.  This is important in order to establish their confidence.  Keep in mind not to rush things, even if that means it takes a few days before you can open up the tunnel a little more.  Once your dog is comfortable with the short tunnel, begin to un-scrunch the tunnel to make it longer.  Do this gradually and train your dog to drive through the tunnel.  (To see how to teach them to drive through an obstacle, watch this video - an introduction to jumping)  Once the dog is driving through the completely extended, straight tunnel, it is time to add some curves.  Gently curve one end of the tunnel and add more curve when you and your dog feel ready.  Remember, at agility trials, the tunnels can be straight or curved, so it is important for your dog to be comfortable with it both ways!

I hope you were able to find this video helpful and remember to leave any questions below! 

-Hayley


Wednesday, October 14, 2015

Dog Agility Week Four: Training the Agility Teeter


Hello everyone!

This week we will be looking at a challenging, yet fun obstacle that is necessary to teach to your agility dog.  This obstacle is the teeter!  The teeter is used in many dog agility venues and used in the Standard courses of AKC trials.  Like I said, it can be a little tricky to teach, but, once trained, it is truly amazing to watch your dog soar up and over the teeter with confidence!  Here in this video you will see some basic tips and tricks, but keep reading to know anything and everything there is to successfully training the teeter.

As you will see in the video, the "bang game" is a common game to teach your dog to establish their confidence with the loud noise the teeter will make when it hits the ground.  At an agility trial, the dog must ascend up the teeter and may not jump off the teeter until it has hit the ground.  This means that your dog MUST be comfortable with the loud "bang" that the teeter does make.  So to play the bang game, begin with lots of treats and lift up one end of the teeter and have the dog step on it so that it hits the ground.  Begin by lifting the teeter just a few inches off the ground and work your way up to holding it up as high as you can.  By spending time teaching this game, your dog will have more confidence around the teeter and will be prepared to actually climb up the obstacle.

Now once you feel that your dog is MORE THAN CONFIDENT (I'm stressing this because you do not want your dog to ever be afraid of any obstacle) with the bang game, it is time to move on to a more challenging approach.  Direct your dog up the plank and reward them with treats as they climb up.  When they get to the end of the plank, before it hits the ground, slowly lower it down to the ground and heavily reward your dog.  Continue this until your dog understands the concept of the teeter.  Once your dog is confident with this exercise, continue with the same steps, but now as your dog approaches the end of the teeter, let it drop to the ground and make a noise.  Begin by letting it drop only a few inches and slowly increase the height. 

Remember that training the teeter is probably not something that will be accomplished in only one training session.  The teeter takes a lot of time and work, so be prepared, and always keep it fun for the dog!

I hope you were able to find this helpful and leave any questions below!

Happy training!

-Hayley

Sunday, October 4, 2015

Dog Agility Week Three: Front Cross, Blind Cross and Rear Cross


Hi Everyone!
In this week's video, we will be looking at another fundamental handling technique used in dog agility.  The front cross, blind cross, and rear cross are the most used and most important handling techniques for you and your dog to know.  In the video, you will see that I used them with only two jumps, when in reality, these crosses are used with any and every obstacle.  It is important that once your dog understands the concept that you practice them with every obstacle.

Front Cross
To train the front cross, begin without any obstacles and place your off-leash dog on either side of you (just remember to practice with the dog on both sides).  Then cross in front of your dog and you will end up on the opposite side of them.  (So if your dog was on your left and first, now your dog will be on your right!)  This cross is used so that you will not lose sight of your dog when having to switch sides.  Continue training this without any obstacles and build up speed and distance.  When you are ready for obstacle, I recommend setting up two jumps in the same way as I did in the video.

Blind Cross
To train the blind cross, begin as you did with the front cross, but this time when you go to switch sides, do it in front of your dog and do not turn into them.  Remember that when you use the blind cross, you do have to be ahead of your dog.

Rear Cross
To train the rear cross, send your dog forward for a treat or toy placed on the ground and while you are behind them, switch sides.  This is helpful for when you are running a course and you do not have enough time to get in front of your dog for a front or blind cross.

I hope you find this helpful and leave any questions below!

Happy Training

-Hayley